Latest Post

Recently my mobile phone number ended up on a prospecting list (associated with my mother's house in Saint-Quentin Lamotte, as owner of the house, which should not be possible, but let's move on), and I am now Regularly harassed by telephone by certain unknown numbers at the battalion several times a day. It's annoying, very unpleasant, fortunately, there is a way to fix it.


I first wanted to go through an application. Indeed, I am not the only one affected and some propose solutions, except that in my case it also blocked all notifications of application, which was not what I was looking for. Also, the original Google application does not allow blocking a contact directly from the history or address book. But there is the very practical option that robots do not like at all. So I created a garbage contact in which I add all the numbers that I identify as I step:


The Little check box that changes life
On this contact, I activate an option that says to send directly to the mail. And that's the job. So for the unknown numbers, it will necessarily annoy you at least once. But a search on your favorite engine quickly made to confirm that it is indeed a robot of canvassing and PAF, the addition to the contact is done in two strokes of fingers and peace reigns again on the phone.

Paradoxically, this is an option that is integrated with Windows phone, which I had the opportunity to set up on the phone that had served me as a crash test and that I gave to a friend. I also think that IOS allows this too, and worse, it was integrated in older versions of Android, much like the UMS mode for the USB connection removed since the "profit" of MTP whose specification is more than random by manufacturers, Making its operation under Linux very complicated. And Android obliges, it's an unnamed brothel as soon as the builders start using their own application, which it can include such functionality.

I also dream of being able to make a white list system, where only known contacts can contact the phone. It would also be interesting to be able to propose an "outgoing" version, to avoid the cherubs composing any number, and to avoid unexpected invoices. I also imagine that there is an application for this, but I must admit that I have not yet searched. And if better, it could be open-source and on F-Droid, that would be the foot. Sanity to the air to include blocking, but not updated since 2011, so I advise against installing it on a recent phone

Android knows where you are, even if you have already turned off geo-localization for a long time. A news release from the technology giant indicates that Google has been storing antenna tower locations in the vicinity of Android phones since early 2017. The company immediately adds that it has not finally found any usefulness in this kind of information and has therefore interrupted this practice.


How does it work?

When an Android mobile device was passing near an antenna tower, it contacted Google's servers to report the location of the latter. This was also done even if the user had disabled the location data in the operating system, as written in the Quartz online magazine. Google would have been able to know the location of the users at any time. According to the company itself, this practice was part of an experiment aimed at improving the sending of messages via mobile networks. It now ensures that it has not used or maintained this information and that Android has in the meantime been adapted to no longer transfer the data relating to the pylons in question.

The reason that the location data was also transferred, even if the users had disabled them, was inherent, according to Quartz, to the service that was transferring them. Antenna towers were in fact in contact with Firebase Cloud of Android, an element that supports text messages and notifications. However, this element is independent of the ' location data ' that the user can disable, and that are mostly associated with Google Maps. It was therefore not possible to disable Firebase's messages even if the user knew they existed.

Street View

It is in the meantime the second time that Google sees itself forced to reveal to the world that it really knows where you are everywhere and always. Previously, she had recognized that Street View cars had collected between 2007 and 2010 all the names of the WiFi networks and the MAC addresses of the routers they encountered while circulating. In the years that followed, the company was the subject of some serious warnings for this kind of practice, as well as a few million euros of fines from several organizations in charge of the respect of privacy in the world.

It is not yet known whether these new confessions will also result in fines.


mirroring-Android-screen-to-a-TV

Casting and mirroring Android screen to a TV or a computer has never been easier. If you have a chrome casting dongle it is even easier. Even if you don't have a casting dongle you still can mirror your android on your computer using chrome browser.

Open Chrome browser then navigate to Chrome Store and search for "AllCast Receiver" and add it to chrome.

Allcast-receiver-chrome-android

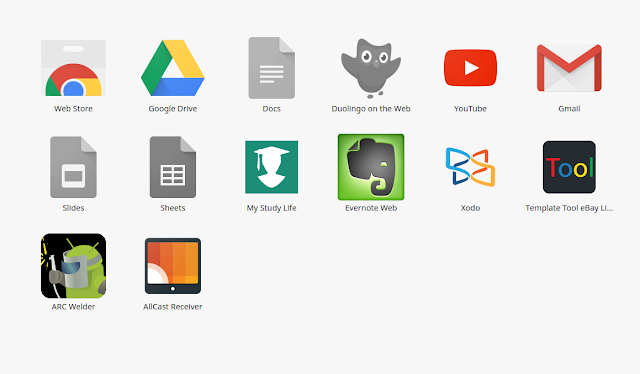
Now go to chrome apps and open All cast receiver

Allcast-receiver-chrome-android

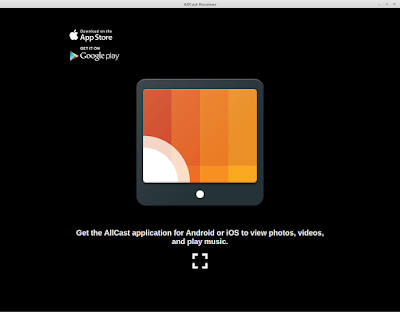
Next you need to Install Allcast Android app from play-store, then open it and you will see your computer's IP on the list. Keep in mind that both your computer and smartphone should be connected to the same WiFi network or it won't work.

Allcast-receiver-chrome-android-mirroring-screen

Now open Allcast in your Android phone and select your computer Ip.


Now select which media you want to mirror. you can mirror Images gallery, audio files..
Just select a video or any media file and it will start playing on your computer right away as easy as that.


The video file was mirrored successfully and now you can select any type of media and just open it on your smartphone and it will easily open on your computer .


Easy right! Now enjoy endless media streaming from your phone to your computer.


Many Android users tend to change their stock android operating system to a different custom Rom for different reasons.


One of the main reasons Android users tend to change their stock Roms is to get more and diversified features. Another reason is to keep your old smartphone updated, as companies such as LG Google Sony do not regularly update their old phones, so in order to get over that and get the latest updates as they come out, then you need to install a custom Rom that has active continuous support.

Today we are taking a look at one of the best feature packed Roms around; Resurrection Remix. It is one of the best well known custom Roms around you can install on your Android phone. it has so many features and options, it is the only Rom that you would ever need. It has lots of developers behind it, they keep it updated, version after version.

Now let's take a look around myour installation of Resurrection remix Nougat version.


This is all where the fun resides in. Go to settings , under personalization tap on configurations and there you will find all the options and features that separate this custom Rom from others. You can change your status bar settings, by adding icons , changing colors, adding custom text and icons, you can add network metrics too which is one of my favorite add-ons.


Next tab you will find panel options, here you will be able to edit everything that is a panel, from notifications to header to volume panels, you could do some heavy customization within this tab.


In next tab you will be able to use custom recents which are way faster and more customizable than the stock recents that come with your smartphone. Resurrection remix comes with 4 options for setting  recents; slim recents, grid, stock and Omniswitch. this one is my favorite, this little buddy supports so many customizations.


In quick settings tab you have many options to customize and edit drop-down tiles, you can edit their layout, animation, behavior and many more.


Lock screen has it's share of customization with this Rom, you can add shortcuts, enable gestures, custom locks and security options. You can add different colors to lock screen icons and shortcuts.


Gestures anywhere feature is the most lovable feature I found on this Rom, it help you be productive and get things done as quick as possible, you can find it on Gestures tab along with other related features.


Next tab is as important as last one, this one gives you the option to customize your buttons, and change their behavior to your liking, you will be more productive using the multi options in this tab.  You can enable or disable hardware keys, or add on screen keys, you can set custom actions per button, volume keys, power button, home. All buttons are editable and customizable.


Animations is the tab where you edit system wide animations, or per app animations, power menu and toast animations can be personalized too. Or you could just disable all system animations at once and enjoy a snappier and faster device.


In Interface tab you could change heads-up settings, screenshot options; which gives you the option to either set full screenshot, or resizable screenshot, with the option of croping and sharing. You can also set up headset settings, blur personalizations, display and font size and many more.


In miscellaneous tab you can change all the other options that does not fit any category. You can block specific apps from accessing specific sensors, you can also remove system apps, and block services that are waking your device up, and consuming your battery. You can look for OTA updates also in this tab.


Last tab is the about tab, here you find official resurrection remix website and their news, changelog, and social media links.

All of this options and customization are only from configurations tab in settings menu, let alone that the Rom is built upon Lineage Os which is a very fast custom Rom, and that there are integreted pre-built features and enhancements that come with Lineage Os.


How To Block A Program From Accessing Internet Using Windows Firewall

Easiest method to stop unwanted applications from accessing the web


Windows comes with an embedded software that gives the user the ability to filter apps or programs that has access to the Internet. It is called Windows Firewall, it has been around since Windows XP.
[next]


Operating windows firewall is a little bit difficult for novice users. In this post  I'm going to show you how to block specific programs using Windows firewall.
[next]
  • Open Control Panel

  • Search For Firewall in Search Bar


  • Open Windows Firewall 

  • Click on Advanced Settings


  • Now depending on your choice and your situation choose one of these two options


Choose 1 if you want the firewall to block incoming requests[/content]
Choose 2 if you want the firewall to block outgoing requests[/content]


In general if your main goal is to just block the program, you can use any of the two choices which will initially give you the same results.


FOLLOW ALONG WITH PICTURES !!


That's it now the program cannot access the internet unless you disable the rule. 


KDE NEON is a relatively new Linux Distro that uses Kde as its default desktop.
It is a very good looking and perfect desktop for everyday use. 

Steps To Download And Install:

  • Go to KDE NEO Download Page
  • Download Developer Edition Git-Stable
  • Use Universal Usb Installer to burn it to usb
  • Reboot to Bios (boot options) and choose your usb
  • Select Install from Menu
  • Follow along with installation (set language, installation disk time ... )
  • After installation is complete eject usb and reboot your PC 

Setting up working-environment


  • Download chrome, then enter "dpkg -i path-to-downloaded-chrome.deb" to install If you get an error try running "apt-get -f install"


  • Install vlc terminator virtualbox vokoscreen kdenlive using apt-get 


If you are not familiar with terminal you can use software center instead to install all of the above apps except chrome which you have to download from their website.

For more info you can refer to the video below for a thorough explanation 


Thanks for watching don't forget to share 


Wireshark is an opensource framework that you can use to capture data on your network, be it a wired network or a wireless network. it has long learning curve but once you get the hang of it it will be of good help for you.

To install wireshark follow bellow step by step instructions,

Open a web browser.
Navigate to http://www.wireshark.org.
click on Download Wireshark.

after you download the package, locate it in your downloads folder next open it To install Wireshark:


  • Select Install to begin installation.
  • Select Next > to install WinPcap.
  • Select Next > to start the Setup Wizard.
  • Select Finish to complete the installation of WinPcap.
  • Select Next > to continue with the installation of Wireshark.
  • Select Finish to complete the installation of Wireshark.


Make sure you install WinPcap it is very important for data capture, if after you install wireshark you get an error of no interfaces found, simply reinstall it and you will be good to go.  For a step by step Tutorial watch the video bellow on Youtube.


Mustafa N-b

{picture#YOUR_PROFILE_PICTURE_URL} YOUR_PROFILE_DESCRIPTION {facebook#YOUR_SOCIAL_PROFILE_URL} {twitter#YOUR_SOCIAL_PROFILE_URL} {google#YOUR_SOCIAL_PROFILE_URL} {pinterest#YOUR_SOCIAL_PROFILE_URL} {youtube#YOUR_SOCIAL_PROFILE_URL} {instagram#YOUR_SOCIAL_PROFILE_URL}

Contact Form

Name

Email *

Message *

Powered by Blogger.